
Interface Dents
Learn how to make dents in your interface! A great way to learn how to use the dodge and burn tool.
- Burn Tool
- Dodge Tool


Note: You need a flat surface or relatively flat surface on your interface to do this tutorial. For the purposes of this tutorial, my "interface" will be a flat layer filled with the color Hex #333333. I recommend you also try this tutorial on a background of #333333 before doing it on your real interface.
Because this is a complex tutorial, I will teach you how to make a dent in a small area. Create an new image 70x70px. Change the Foreground Color on the Color Palette to Hex #333333. Fill ( Edit > Fill ) the background layer with the Foreground Color. I am going to make a bunch of pictures for every tool I use and every step. I will be only using two tools. The Dodge Tool and Burn tool.
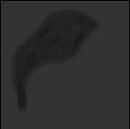
First I will use the Burn Tool. It is right under the gradient/paintbucket tool. It looks like a hand. The Burn Tool "darkens" the areas it is used on. Change the settings of theBurn Toolto:
Brush: 5px
Range: Midtones
Exposure: 25%
Airbrush: Not selected
Just try to copy what I do in every image with your own Burn Tool! It will help you learn faster! Ok here I go (all my images are zoomed in).

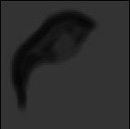
It is time to use the Dodge Tool. The Dodge Tool "lightens" the areas it is used on. This tool is right under the gradient/paintbucket tool. It may be hidden behind the Burn Tool. Select the Dodge Tool and set its settings to:
Brush: 5px
Range: Midtones
Exposure: 25%
Airbrush: Not selected
Once again, just try to copy what I do in every image with your own Dodge Tool! It will help you learn faster! Ok here I go (all my images are zoomed in).


Re-choose the Burn Tool except with the following new settings:
 Brush: 5px
Range: Midtones
Exposure: 10%
Airbrush: Not selected
Now lightly darken the outer rim of the shadow of the dent.
Now re-choose the Dodge Tool except with the new settings
 Brush: 5px
Range: Midtones
Exposure: 10%
Airbrush: Not selected
Now slightly lighten the outer rim of the lighted of the dent.
Now comes the final step. You must visualize this dent as 3D. Visualize which parts would be brighter. Change the Dodge Tool's settings to:
Brush: 3px
Range: Midtones
Exposure: 10%
Airbrush: Not selected
 Now you must use many many tiny strokes of the dodge tool to add the finishing touches. The changes should not be too durastic. Rather, they shoud just be there to show that the inside of the dent has interesting contours as well.
