
Interface Holes
Add this detailed grimy hole to your layout to make it eye catching!
- Patterns
- Elliptical Marquee Tool
- Contract Selection
- Fill
- Burn Tool


First we will be creating the pattern we will be using for the inside of the hole.
 Create a new image 4x4px and using the Pencil Tool set to 1px, draw something like the image to the right.
Define your pattern ( Edit > Define Pattern ) and close the image.
Note: You need a flat surface or relatively flat surface on your interface to do this tutorial. For the purposes of this tutorial, my "interface" will be a flat layer filled with the color Hex #333333. I recommend you also try this tutorial on a background of #333333 before doing it on your real interface.
Open your Interface and find a nice place to add this detail to. Holes are a great way to fill "open" areas on your interface. My "interface" is a flat layer of color Hex #333333. From now on, I will call the already existing interface (or in my case my background) the "background".
Create a new layer and name it "edge".
Choose the Elliptical Marquee Tool. Look for it's options on the top of the Photoshop window. There should be "Style:" with a dropdown. From the dropdown, select Fixed Size. For the "Width" put 42px and for the "Height" put 42px.
Make a selection using the Elliptical Marquee Tool on the background.
Reset the Color Palette ( Press D ). Choose the Gradient Tool and make sure it is set to Linear Gradient from black to white. Also make sure Reverse is not checked.
 Draw a gradient by clicking the bottom right of the selection's circumference and dragging to the top left of the circumference. Do not deselect after doing the gradient. You should have something like the image to the left.
Contract ( Select > Modify > Contract ) your selection by 1 pixel.
Create a new layer and name it "circle".
 Draw a gradient by clicking the top left of the selection's circumference and dragging to the bottom right of the circumference.
 Now on the Layer Palette, Ctrl-click the thumbnail of layer "circle" then click on layer "edge" to activate it. Press delete to remove the selection from layer "edge". Change the Blending Modes of both layer "circle" and layer "edge" to overlay.

 Choose the Elliptical Marquee Tool and change the fixed width to 30px and height to 30px. make a selection in the middle of the circle like the sample to the left.
Create a new layer and name it "hole". Fill ( Edit > Fill ) the selection with the pattern you made in Step I.
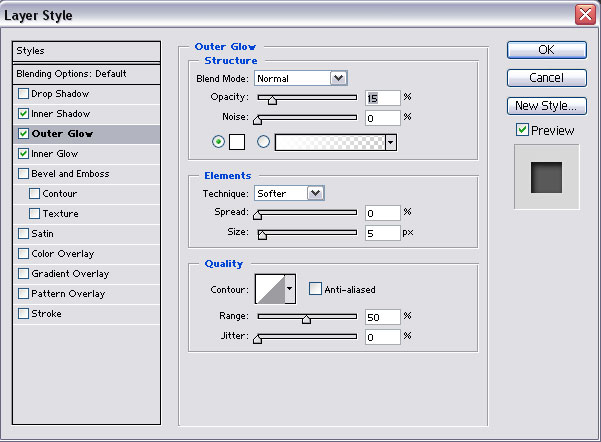
Open the Blending Options for layer "hole" and apply the styles shown in the images below.


Activate layer "circle" on the Layer Palette. Choose the Burn Tool. It is right under the gradient/paintbucket tool. It looks like a hand. The Burn Tool "darkens" the things it touches. Change the settings of the Burn Tool to:
 Brush: 1px
Range: Midtones
Exposure: 100%
Airbrush: Not selected
Burn the bottom part of layer "circle" as if there were grime coming out of it. Look at the image above for reference.
 Now activate the background layer and burn the part under the circle to make it look like the grime went on the background. Look at the image to the left for reference.
It will definitely take more than one stroke with the Burn Tool to create the effect above. Just play around and have fun! After all, you can just undo.
