
Interface Cracked Metal
Not your average crack, learn to make one where the metal is actually peeling back.
- Pencil Tool
- Move Tool
- Dodge Tool
- Burn Tool
- Gaussian Blur


Note: You need a flat surface or relatively flat surface on your interface to do this tutorial. For the purposes of this tutorial, my "interface" will be a flat layer filled with the color Hex #333333. I recommend you also try this tutorial on a background of #333333 before doing it on your real interface.
Open your Interface and find a nice place to add this detail to. My "interface" is a flat layer of color Hex #333333. From now on, I will call the already existing interface (or in my case my background) the "background".
 Create a new layer and name it "black". Reset the Color Palette by pressing D. Start by using the Pencil Tool with a width of 1px. Draw a line of where you want the crack to go. Duplicate layer "black" and name the new layer "white". Move layer "white" below layer "black".
 Now, with the layer "white" activated in the Layer Palette, choose the Move Tool and move layer "white" 1 pixel down and 1 pixel to the right. Invert ( Ctrl-I or Image > Adjustements > Invert ) the colors of layer "white".
Most tutorials end here but this one does not. How can you leave a crack so and flat? Time to add some depth!
First, change the Blending Mode of layer "white" to "soft light".
Now comes the fun part. In order to add depth to something, you have to have a light source. The light source in this case is going to be from above.
We are going to have to lighten and darken parts of the background to make it look like the metal is "bending upwards" from the cracks.
 We are going to lighten stuff ABOVE the lines and darken stuff UNDER the lines.
First, we are going to darken the parts under the lines.
Time to take out the Burn Tool. It is right under the gradient/paintbucket tool. It looks like a hand. The Burn Tool "darkens" the areas it is used on. Change the settings of the Burn Tool to:
 Brush: 3px
Range: Midtones
Exposure: 75%
Airbrush: Not selected
Choose the background layer. I would recommend Zooming In ( View > Zoom In ) to do this. You are going to add shadows now. The best way to explain this is by images so follow the refernce images above. All I am going to do first is outline where I am going to burn with a preliminary burn. In other words, we are going to darken the parts under the lines.
 Cool! Now you are going to do the same thing with the Dodge Tool except above the lines. The Dodge Tool "lightens" areas where it is used. This tool is right below the gradient/paintbucket tool. It may be hidden behind the Burn Tool. Select the Dodge Tool and set its settings to:
Brush: 3px
Range: Midtones
Exposure: 75%
Airbrush: Not selected
Lighten the parts above the lines as is shown in the reference image above.
It is now time to add the actual shading. Take out the Burn Tool again and change its settings to:
Brush: 3px
Range: Midtones
Exposure: 20%
Airbrush: Not selected
Darken the areas around the black "burns" you already made. Remember that the parts closer to the lines should be darkened more!

Now time to do the same thing with the Dodge Tool.


It is time to add more detail to the ridges.
Change both the exposure of the Dodge Tool and the Burn Tool to 10%. Also, change the sizes of both to 5 pixels.
Take both tools and smooth out the edges of the ridges so hey blend into the background more.


 It is time to add even more detail. Change the size of the Burn Tool to 1 pixel. Change the exposure to 100%.
You are going to darken about 2 pixels of the white shading closest to the line. In other words, burn a 2 pixel line on the white side of the line.
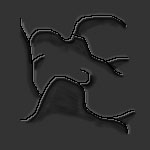
 Almost done! Ok now as you can tell, the lines are pretty ugly. Gaussian Blur ( Filter > Blur > Gaussian Blur ) both layers "white" and "black" with a strength of "0.3". You are done!
Optional: You can Gaussian Blur ( Filter > Blur > Gaussian Blur ) the background if you think your brush job was a little rough. It is safe to go up to a strength of 0.5.
