
3D Spiral Abstract
Learn how to create this controllable, versatile, 3D Spiral Abstract using tools such as the pen, perspective, and actions.
- Pen Tool
- Paths
- Chrome
- Free Transform - Perspective
- Rotate


Reset the Color Picker ( press D ). Create a new image anywhere from 500x500px to 1000x1000px with a "transparent" background. I like to use 1000x1000px on these because it pulls out more details.
Keep in mind how much RAM you have because this tutorial is RAM intensive. For the purposes of this tutorial, I will be using a 500x500px image. Fill ( Edit > Fill ) the background with Black ( Hex #000000 ).
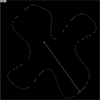
 Create two new layers. On the top layer, using the pen tool, draw a three to four pointed blob. You can see an example to the right.
To use the pen tool, just click, drag, release. It will create nice lines for you.
Click on the "Paths" tab (next to Layers and Channels). You should see the shape you just created. Right click on the "Work Path" and go "Make Selection."

 Go back to the Layers tab and make sure you are on the top layer. Take the gradient tool and make a gradient like the one to the left. Drag the gradient from around the center of the blob to one of the edges.
![]()
Without deselecting, use the Chrome Filter ( Filter > Sketch > Chrome ) with the settings below.


Deselect ( click outside the selection or press Ctrl-D ).
 This part is a bit tricky. Right-click the blob and choose "Free Transform." Right click it again and go "Perspective." Grab the lower right corner and drag it all the way to the left. The free transform lines should make an hourglass shape. Double-click inside the transform box to apply the transformation.
If you have Photoshop 6, go Edit > Transform > Perspective instead.
 Right click the blob again and choose "Free Transform." Once again, right click and choose "Perspective." This time take the upper right corner and pull it all the way down. Double-click inside the transform box to apply the transformation.
 Right-click on the layer with the blob on it and open up the Blending Options. Put a "Drop Shadow" on it with the settings to the left.
In the "Layers" panel, click on the eye next to the black background layer to hide it. Click on the layer with the blob on it and Merge Visible ( Layer > Merge Visible ). Unhide the black background layer.
Great you are done creating the base!
First we need to create the action. An action is a set of procedures that can be automatically run. Right now you should have two layers, the background and the blob.
Make sure you are on the layer with the blob on it. Click on the "Actions" tab (by the "History" and "Tool Presets" tabs). Click on the "New Actions" button (it looks like a paper with its edge folded).
Name your new action "Abstract Twist" and assign any "Function Key" (make sure you remember your function key).
The Action is now recording. This means it is recording ever step such as moving something or using a filter. Duplicate the Blob layer. On the new blob layer, Go Edit > Transform > Rotate and enter the settings below:
![]()
You should not touch the X and Y values. Press the Stop button on the Action tab to stop recording.
Now comes the RAM intensive part. You should be on the blob layer right now. What we are going to do is use the action to rotate and resize the blob over and over until it is unnecessary.
 Start pressing your Function Key (from step 1) over and over again (not too fast or Photoshop will not be able to keep up) until the blob gets so small that you cannot see it.
Awesome! You have created the Abstract!
Let’s add some color!
Hide the background layer. Choose any blob layer and Merge Visible ( Layer > Merge Visible ). Create a new layer above the blob layer. Fill ( Edit > Fill ) this layer with any color you want. Change the Blending mode of this layer to "Color".
Ctrl-click the blob layer to create a selection of the abstract. Invert the Selection ( Select > Inverse ) and press Delete.
 This concludes the 3D Spiral Abstract tutorial. You should keep playing with settings because this method of abstracts in Photoshop is very versatile. Below are some examples of how different they can be. Have fun!
 - If your abstract seems too dark, duplicate the layer and set the upper layer’s Blending Mode to "screen".
- If you want to make your abstract glow, do not delete the inverted selection in Step 9 . Instead, duplicate the layer with the abstract on it and set the upper layer’s Blending mode to "screen". Apply a Gaussian Blur ( Filter > Blur > Gaussian Blur ) the upper layer with a power of 2-5.
- Want to make your abstract more colorful? You can paint directly over the layer with color to change the colors!


